
Sprinkler Valves
One valve per zone, and when a zone misbehaves the valve is almost always why. Here is how a sprinkler valve works, how to tell an electrical fault from a hydraulic one, and when to rebuild it rather than replace it.
By the Calculate My Reno Team / Published
Skip to the tool
Open the Irrigation & Watering Zone Calculator
A sprinkler system has one valve per zone, and it is the part that fails. Heads get run over and pipe gets cut, but the thing that actually wears out on a schedule is the rubber inside the valve - a diaphragm that flexes every time the zone runs, and a solenoid coil that sits outdoors in a wet box for twenty years.
How a sprinkler valve works
It is not a motor turning a tap. Nearly every residential zone valve is a normally closed diaphragm valve, and it uses the water’s own pressure to hold itself shut:
- Line pressure bleeds through a tiny port into the chamber above the rubber diaphragm.
- The top face of the diaphragm has more area exposed to that pressure than the inlet side does, so the same water pushes the diaphragm down onto its seat and holds the valve closed.
- The controller sends 24 volts AC to the solenoid. The solenoid lifts a plunger that vents the upper chamber.
- Pressure above the diaphragm drops, line pressure lifts it off the seat, and the zone runs.
- Voltage off, the plunger drops, the upper chamber refills, the diaphragm reseats.
Two useful consequences fall straight out of that. A valve needs water pressure on top of the diaphragm to close, so a zone that will not shut off is nearly always something on the water side - grit under the diaphragm, a split diaphragm, a bleed screw left open - and hardly ever the wiring. And the bleed screw or the solenoid can vent that chamber by hand, which is the single most useful test in the whole system - see below.
The two types
| Anti-siphon valve | In-line valve | |
|---|---|---|
| Where it goes | Above ground, on a riser | Below ground, in a valve box |
| Backflow protection | Built in - the valve has an atmospheric vacuum breaker on top | None - a separate backflow device is needed upstream |
| Height rule | Must sit above the highest head it feeds, typically at least 6 in (150 mm); local code sets the figure | No height rule |
| Downstream pressure | Nothing after it may be under constant pressure | Fine |
| Freezing | Exposed, so it has to be drained or insulated | Protected by the ground |
Common residential sizes are 3/4 in and 1 in, matched to the flow that zone carries rather than to the pipe you happen to have. Every valve body has a flow-direction arrow cast into it, and fitting one backwards is a genuinely common mistake - the diaphragm cannot seat against reversed flow, so the zone runs constantly the moment the water goes back on.
The one test that splits the problem in half
Before you buy a part, open the valve by hand. Turn the water on, leave the controller alone, and either open the manual bleed screw or unscrew the solenoid about a quarter turn - both vent the chamber above the diaphragm.
- The zone runs. The water side is fine. Your fault is electrical: solenoid, wiring or controller.
- The zone does not run. The electrics are irrelevant for now. Your fault is hydraulic: no water upstream, a failed diaphragm, or debris jamming the valve.
Close the bleed screw or retighten the solenoid afterwards - hand tight, and no more, because the seal is an O-ring rather than a thread.
Fault-finding
| Symptom | Most likely cause | Check |
|---|---|---|
| One zone will not start | Failed solenoid or a corroded wire splice | Manual test above; then check the solenoid with a meter |
| No zone will start | Break in the shared common wire, or the controller | Try several zones - if all are dead, it is the common or the controller, not the valves |
| Zone will not shut off | Grit under the diaphragm | Shut the water off, open the valve, flush the diaphragm and seat |
| Zone will not shut off, and never has | Valve plumbed backwards | Look for the flow arrow on the body |
| Zone runs at low pressure | Diaphragm partly blocked, or the valve is undersized for the zone | Compare against the other zones |
| A few heads dribble after every cycle | Not a valve fault - it is low-head drainage | The lowest heads on a zone drain the lateral after each run; check valves in those heads stop it |
A dead solenoid is easy to confirm with a multimeter. Disconnect it and read across its two leads: a healthy coil measures a resistance in the tens of ohms - the exact range is on the manufacturer’s spec sheet - while an open circuit means a broken coil or a broken wire, and near zero means a short.
The unglamorous cause of most dead zones is the wire splice. Irrigation wiring is buried and permanently damp, so the connectors have to be the waterproof gel-filled or grease-capped kind. A plain twist-on connector corrodes through in a few seasons, and the zone dies for a reason that has nothing wrong with the valve at all.
Rebuild or replace?
Rebuild, in most cases. The two parts that fail - the diaphragm and the solenoid - are both cheap and both replaceable in place, and most manufacturers sell a rebuild kit for each valve family. The body is brass or heavy plastic and outlasts everything bolted to it.
Replace the whole valve when the body is cracked, when the threads or the bonnet screws have failed, or when the valve is simply the wrong size for the zone. And if the valve is an obsolete make with no parts available, replacing it is the only option - which is a good argument for keeping every valve in a box the same model.
Replacing a valve
- Shut the water off at the irrigation isolation valve. The mainline up to the valves is under pressure all the time, and that is the pressure that will meet you when the body comes apart.
- Turn the controller off, then note which wire went to which valve before you cut anything. Photograph the box.
- Cut the wires long. Leave enough slack to make a fresh splice without stretching - you will want it again in ten years.
- Fit the new valve the same way round, following the flow arrow. On threaded plastic fittings use thread sealant tape and go hand tight plus about half a turn - no more. Overtightening splits plastic threads, and there is no fixing that in a box.
- Splice with waterproof connectors. Every valve gets its own control wire plus the shared common.
- Turn the water back on slowly and let the line refill before you run a zone. Then run it, watch the valve for weeping, and check the heads.
Leave the valve box lid accessible. Burying a box under mulch or sod turns a fifteen-minute repair into an afternoon of digging.
One valve per zone
Because each valve serves exactly one zone, sizing the system and counting the valves are the same job: the number of zones your supply flow can support is the number of valves you need to buy, wire and eventually maintain. The sprinkler zone calculator works that out from your area, head type and supply flow, and how many sprinkler heads per zone explains the arithmetic behind it.
A master valve is the one exception worth knowing about: an extra valve at the mainline that opens whenever any zone runs, so the mainline is only pressurized while the system is watering. It is not a zone valve and does not count as one.
Frequently asked questions
What is a sprinkler valve?
It is the electrically operated tap that feeds one zone. The controller sends 24 volts to the valve solenoid, the valve opens, and that zone runs until the controller drops the voltage again. There is one valve per zone, which is why the number of valves and the number of zones are always the same number.
Why will my sprinkler valve not turn off?
Nine times out of ten it is grit. A sprinkler valve is held shut by water pressure on top of a rubber diaphragm, and anything caught between the diaphragm and its seat leaves a gap the pressure cannot close. Shut the water off, open the valve body, lift out the diaphragm and flush it and the seat clean. The other causes are a bleed screw or manual lever left open, a diaphragm that has hardened or split, and a solenoid that is not seating - all cheap parts.
Why will my sprinkler zone not turn on?
Open the valve by hand first, either with the bleed screw or by unscrewing the solenoid a quarter turn. If the zone runs, the water side is fine and the fault is electrical - a failed solenoid, a corroded wire connection or a break in the wire. If it still does not run, the fault is hydraulic - the water is off upstream, the diaphragm has failed, or debris is jamming the valve shut. That one test splits the problem in half before you buy anything.
Can I replace just the solenoid?
Yes, and it is usually the right call. The solenoid simply unscrews from the top of the valve. Shut the water off first: the solenoid seals the port that vents the chamber above the diaphragm, so unscrewing it on a live valve opens the zone and lets water out of the port - which is exactly how the manual bleed works. The diaphragm is a separate part, and most manufacturers sell a rebuild kit covering both. Only replace the whole valve when the body itself is cracked or the threads have failed.
Where are my sprinkler valves?
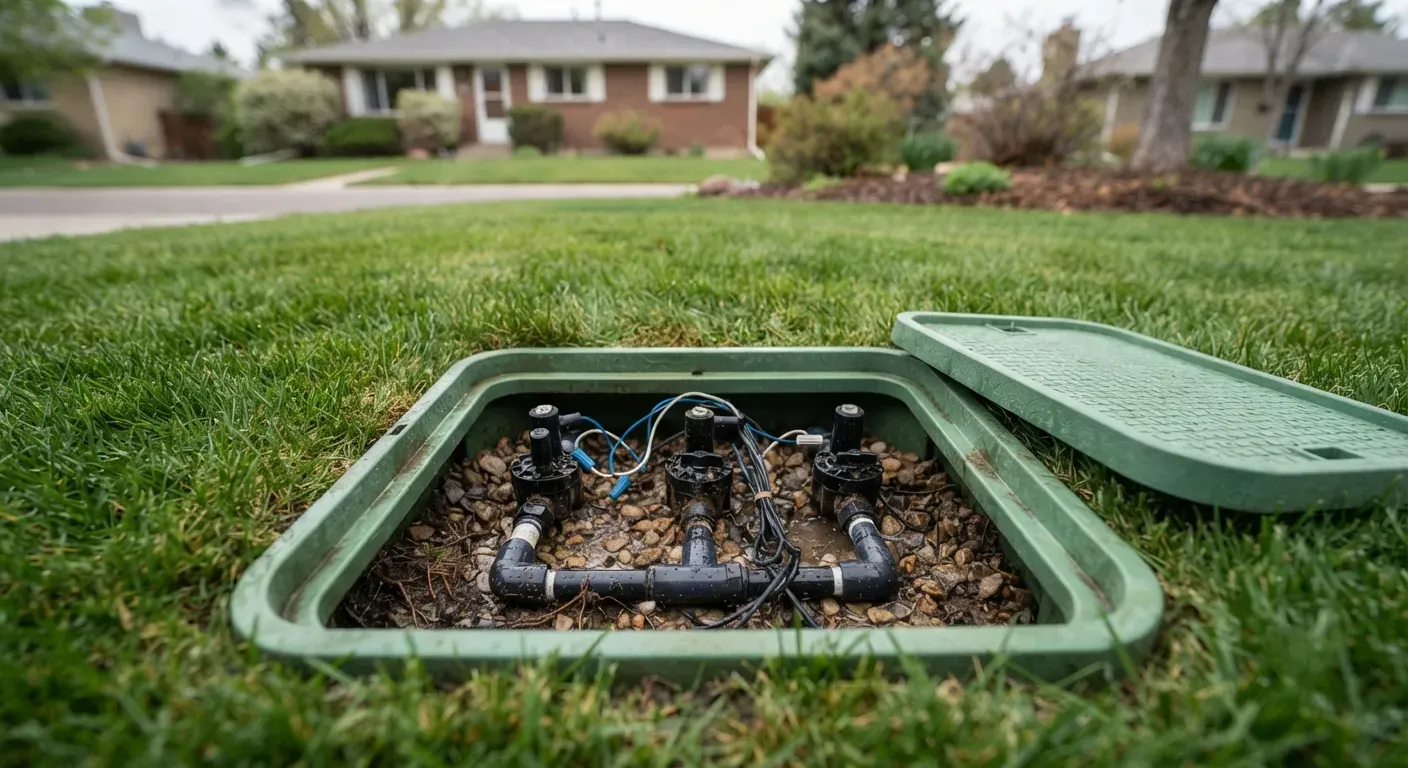
Either in a buried valve box - a green or black plastic lid set flush in the lawn or a bed, usually holding two to six valves side by side - or above ground on a riser near the water supply, which is what an anti-siphon system looks like. If you cannot find the box, run one zone and listen: a valve clicks when the solenoid pulls in, and a running valve hums.
How long does a sprinkler valve last?
The body outlives everything else in the system; the rubber does not. A diaphragm and a solenoid are wear parts, and how long they last depends far more on how dirty the water is and how much sun the valve sits in than on the make. Grit is what kills diaphragms, which is why a valve on a well or an unfiltered supply fails sooner than one on treated mains water.